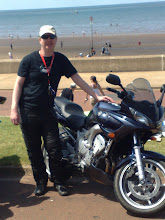
After fitting the new double bubble screen I rode it in to work on Tuesday and the wind now pops either over my helmet when I'm tucked down, or onto the helmet if I'm not (which isn't as annoying as it sounds). Vast improvement on the stock screen so money well spent.. and it looks pretty sharp into the bargain :)
Leaving work in the evening however I got as far as the first right turn (stationary at lights) and noticed no indicators on the dashboard or the lights themselves. I cancelled them, reapplied, tried left and right but nothing. With a straight road all the way home I figured I could just ride it home not overtaking anything and fix it there. I made the turn, got on to the slip road to join the main road, got it up to about 70mph to join the traffic, and the engine cut out, all the lights on the dash went out, and I had engine braking to get me into traffic. Luckily my bowels held out and a hand signal got me into the margin of the slip road safely out of the traffic. After checking side stand (down-up-down-up... yes it's definitely up), engine cutoff (yep.. not that), I looked at the ignition key which was in the OFF position. All I can guess is that if you turn the key to ON (but it's not quite locked in place) it can move back to OFF, in this case at the worst place it could have.
Once I'd calmed down and managed to stop saying a word that rhymes with duck, I turned the key to the much better position of ON, fired up at the first attempt, and spanked the arse off the bike to get up to speed on the remaining 100 yards of the slip road before joining the main drag.
One to watch out for in future, but at least no harm came of it this time, other than to people with delicate sensibilities who may have been within earshot of me at the time.
Saturday, 16 May 2009

Monday, 11 May 2009
Double Bubble action
I've been noticing that on the way to work, as I'm "making progress" the wind tends to hit me in the Adams apple which is annoying to say the least. To remedy this, and also pimp my ride a little more, I purchased a Puig Double Bubble screen from those lovely people at eBay. This is slightly taller than the stock screen so should divert the breeze over the top of my head if all goes to plan.
The stock screen looks like this.

It's a screen and.. well.. that's all there is to it.
The new screen looks like this.

You can see it is a little taller than the stock one, with the bubble in the middle (of double bubble fame). It's also got a Puig and FZ6 logo on the front... which is nice :)
This is it in place.

The changing is simple as the screen is only held on by two screws under each of the rubber boots on the wing mirror stalks, and one under the lights where the screen curves under. The only tricky part is the edging which is a plastic beading that you need to feed onto the edge of the screen. Swapping screens was 5 mins and the next 20 mins was fitting the beading, then taking it off to adjust it. If you're doing this then feed the first edge down far enough so it disappears under the rubber boot as that seems to look neatest. The excess is then trimmed with scissors.
Tomorrow should see this taking for its maiden voyage to work to see if it was money well spent, or just vanity on my part :p
The stock screen looks like this.

It's a screen and.. well.. that's all there is to it.
The new screen looks like this.

You can see it is a little taller than the stock one, with the bubble in the middle (of double bubble fame). It's also got a Puig and FZ6 logo on the front... which is nice :)
This is it in place.

The changing is simple as the screen is only held on by two screws under each of the rubber boots on the wing mirror stalks, and one under the lights where the screen curves under. The only tricky part is the edging which is a plastic beading that you need to feed onto the edge of the screen. Swapping screens was 5 mins and the next 20 mins was fitting the beading, then taking it off to adjust it. If you're doing this then feed the first edge down far enough so it disappears under the rubber boot as that seems to look neatest. The excess is then trimmed with scissors.
Tomorrow should see this taking for its maiden voyage to work to see if it was money well spent, or just vanity on my part :p
Sunday, 10 May 2009
You can never have too much lubrication
After reading a couple of articles on the FZ6 forum I invested in a cable lubrication do-hickey (to give it it's technical name) courtesy of those lovely people at eBay. Sunday morning was bright and sunny so I decided to do a before and after run to see if there really was any effect.
A quick trip the the local shop for sunday paper and a tank full of petrol gave me the reference point before I started to fettle with anything. Next was the tricky bit of getting the end of the clutch cable out along with the sheathing. Luckily I'd invested in a Haynes manual which explains how to do this and after a quick look at the pictures I set to on it.
First step was to take a picture of the cable adjuster before I did anything so I could put the cable back again exactly as it was to start with.

There's a cut out along one edge of this adjuster (and the large disc) which locks it in position against the tab you can see touching the top of the large disc. As long as I ended up with the same 5 threads visible when it was locked I knew I was back where I started. To get the cable out you must spin the adjuster so it goes tight into the handlebar bracket (moves to the right in this pic) and with the slot down one side facing forward lining up with the one in the bracket. By then wiggling the rigid cable sheath it pops out of the adjuster and the cable itself then can be fed out of the slot in the front. The small cylinder that locks it in the clutch lever then drops straight down and you have one free cable.
Next is the attachement of the magic cable luber which looks like this.

The inner cable feeds through the centre of the rubber bung and the bottom of the rigid sheath goes into the bottom of this. The clamp is then closed which seals against the bottom of the sheath allowing the top of the cable to poke out (you can see the cylinder on the end which locks it in the clutch cable). A can of WD40 squirted into the hole in the side then can't go out the top and must go down the gap between the clutch cable and sheath lubricating it. A couple of squirts, a couple of pulls on the cable to let the lube go down, and it all felt much looser.
After wiping everything up (lube near tires... not a good idea) I fired the bike up again and went out for a quick spin.
The clutch felt much smoother than it was to start with so it looks like the WD40 has done the trick. It also appears the bike can knock on the door of 80mph in 2nd ...... which is nice for overtaking coming off roundabouts as I found out on the way back :-)
A quick trip the the local shop for sunday paper and a tank full of petrol gave me the reference point before I started to fettle with anything. Next was the tricky bit of getting the end of the clutch cable out along with the sheathing. Luckily I'd invested in a Haynes manual which explains how to do this and after a quick look at the pictures I set to on it.
First step was to take a picture of the cable adjuster before I did anything so I could put the cable back again exactly as it was to start with.

There's a cut out along one edge of this adjuster (and the large disc) which locks it in position against the tab you can see touching the top of the large disc. As long as I ended up with the same 5 threads visible when it was locked I knew I was back where I started. To get the cable out you must spin the adjuster so it goes tight into the handlebar bracket (moves to the right in this pic) and with the slot down one side facing forward lining up with the one in the bracket. By then wiggling the rigid cable sheath it pops out of the adjuster and the cable itself then can be fed out of the slot in the front. The small cylinder that locks it in the clutch lever then drops straight down and you have one free cable.
Next is the attachement of the magic cable luber which looks like this.

The inner cable feeds through the centre of the rubber bung and the bottom of the rigid sheath goes into the bottom of this. The clamp is then closed which seals against the bottom of the sheath allowing the top of the cable to poke out (you can see the cylinder on the end which locks it in the clutch cable). A can of WD40 squirted into the hole in the side then can't go out the top and must go down the gap between the clutch cable and sheath lubricating it. A couple of squirts, a couple of pulls on the cable to let the lube go down, and it all felt much looser.
After wiping everything up (lube near tires... not a good idea) I fired the bike up again and went out for a quick spin.
The clutch felt much smoother than it was to start with so it looks like the WD40 has done the trick. It also appears the bike can knock on the door of 80mph in 2nd ...... which is nice for overtaking coming off roundabouts as I found out on the way back :-)
Wednesday, 25 March 2009
GPS... mark II
The handlebar mount, after being lost by the postie for 2 weeks, finally turned up today to allow me to mount the Garmin Nuvi on my handlebars.

In this position it doesn't appear to be blocking my field of view of the speedo so I just need to take it for a test drive to make sure it looks OK and we're sorted.
I also took the extra safe option of securing it with a quick release strap to the handlebars in case the mount comes loose.

The Nuvi itself has a pad of velcro securing it tightly to the holder, then a cable tie provides me with a loop to hold on to the cradle. The quick release strap, after I trim it down to make it neater, holds this to the handlebar so if the mount goes, or the ball joint that the Nuvi holder clicks onto goes, I should still have it dangling an inch below the bars rather than bouncing off down the motorway.
Grand total of £4 for the mount, £2 for the quick release and velcro, leaving me with £394 saved from the price of a Garmin Zumo that would do the same thing.
So really I could buy that GoPro Hero wide camera and I'd still have saved money ;-)

In this position it doesn't appear to be blocking my field of view of the speedo so I just need to take it for a test drive to make sure it looks OK and we're sorted.
I also took the extra safe option of securing it with a quick release strap to the handlebars in case the mount comes loose.

The Nuvi itself has a pad of velcro securing it tightly to the holder, then a cable tie provides me with a loop to hold on to the cradle. The quick release strap, after I trim it down to make it neater, holds this to the handlebar so if the mount goes, or the ball joint that the Nuvi holder clicks onto goes, I should still have it dangling an inch below the bars rather than bouncing off down the motorway.
Grand total of £4 for the mount, £2 for the quick release and velcro, leaving me with £394 saved from the price of a Garmin Zumo that would do the same thing.
So really I could buy that GoPro Hero wide camera and I'd still have saved money ;-)
Wednesday, 18 March 2009
Show me the way to go home
This week I have mostly been experimenting with GPS related solutions for my bike. There are three main approaches to take with this.

And in situ with the phone inside the tank bag.

I used this on the way to work and back on the bike this week and found the following slight downsides to this as a solution.

On the test ride to work and back, this had the distinct advantage that
Brum Brum.
- Buy a Garmin Zumo 550. This is designed to work on a motorbike, is waterproof, has bluetooth so you can hear directions in your helmet, and is perfect for the job. It also costs £400, so we'll put that on the "maybe" pile.
- Use the Nokia N95 which comes with Nokia maps already installed. The phone isn't waterproof so it needs to go inside my tank bag. With some velcro strips to stop it sliding around I fashioned the holder (free with screen protectors) and a velcro pad inside the bag.

And in situ with the phone inside the tank bag.

I used this on the way to work and back on the bike this week and found the following slight downsides to this as a solution.
- It costs £6 per 30 days (or £60 a year) in subscriptions for nokia maps to do routing and voice navigation for you. They do give a free 7 day trial which is what I used for this test.
- You can't see the screen very well (if at all) and can only hear directions at low speed.
- It is convinced you are riding off the road despite being on it, so won't give you directions thus defeating the whole idea of using it as a Sat Nav.
- Garmin Nuvi. I already have this so the cost is nothing. I already have the velcro strips off eBay to attach it to the inside of the tank bag (£2).

On the test ride to work and back, this had the distinct advantage that
- It knew I was on the road
- Routed correctly
- Was audible coming up to roundabouts and the like where you need it
- Doesn't cost anything in subscriptions.
- You can see the screen (if you tilt it slightly back with a carrier bag under the far edge, proper solution to follow)
Brum Brum.
Thursday, 5 March 2009
D'oh... a deer... a female deer.
Today happened to be a days holiday and as the snow forecast by those chaps at the met office never materialised it was a shame to leave the bike in the garage so arranged to meet up with Frank (the elder) down in sunny Saffron. Before leaving I checked the outside temperature with my latest eBay purchase (infrared thermometer with laser pointer because... well... Dave has one), and it was a rather brisk 0.6C in the back garden. Ouch!!!!
A quick change into thicker socks (and an additional thermal layer in the tank bag just in case the two jumpers and bike jacket weren't enough) and I was off. Once on the M11 and "making progress" it was getting a bit chilly but as it was only a 20 min trip from there I held on and defrosted my hands courtesy of a cuppa from Missus Frank ;-)
Once Frank had his mittens on, had wiped his nose, and promised to do his homework when he got back, the boys were allowed out to play, Frank in the lead, and me playing catchup.
The roads were pretty twisty, and covered in mud, grit, stones, misc crap (thank you Mr Tractor) so there was no knee down action (and if there was it would be followed by shoulder and head down action I reckon) but I had fun accelerating up the straight bits and plenty of gear changing action (although it seems the Fz6 will do anything from 10-70mph staying in 2nd, which is nice). The 10 miles up to Balsham saw us ready for a pub lunch and a sit in front of the fire to defrost again, so we did courtesy of Mike in "The Bell".
Coming back we dropped onto the A11 where the bike again doesn't appear to need all its gears before coming back through the villages again heading for home.
Not 1 mile from my front door, a Muntjac Deer decided to run across the road right in front of me and I had visions of the chicken episode all over again, but on a much larger, and more painful scale. Luckily I slowed enough to let it sneak in front of my front tire and across the road and Frank was far enough back to not run into the back of me. Fresh underpants were donned at home, and a cuppa made things all right in the world once more.
Roll on spring when the weather warms up a bit and we can get out for more bimbles in the countryside.
A quick change into thicker socks (and an additional thermal layer in the tank bag just in case the two jumpers and bike jacket weren't enough) and I was off. Once on the M11 and "making progress" it was getting a bit chilly but as it was only a 20 min trip from there I held on and defrosted my hands courtesy of a cuppa from Missus Frank ;-)
Once Frank had his mittens on, had wiped his nose, and promised to do his homework when he got back, the boys were allowed out to play, Frank in the lead, and me playing catchup.
The roads were pretty twisty, and covered in mud, grit, stones, misc crap (thank you Mr Tractor) so there was no knee down action (and if there was it would be followed by shoulder and head down action I reckon) but I had fun accelerating up the straight bits and plenty of gear changing action (although it seems the Fz6 will do anything from 10-70mph staying in 2nd, which is nice). The 10 miles up to Balsham saw us ready for a pub lunch and a sit in front of the fire to defrost again, so we did courtesy of Mike in "The Bell".
Coming back we dropped onto the A11 where the bike again doesn't appear to need all its gears before coming back through the villages again heading for home.
Not 1 mile from my front door, a Muntjac Deer decided to run across the road right in front of me and I had visions of the chicken episode all over again, but on a much larger, and more painful scale. Luckily I slowed enough to let it sneak in front of my front tire and across the road and Frank was far enough back to not run into the back of me. Fresh underpants were donned at home, and a cuppa made things all right in the world once more.
Roll on spring when the weather warms up a bit and we can get out for more bimbles in the countryside.
Saturday, 28 February 2009
Ally Pally. Home of the BBC and bike shows
The return of the Ally Pally bike show and Paul, Frank and I headed down there with two wheels each as the weather was cool but not cool enough to wuss out and take the car.
Due to rather poor navigational skills on my part, I took the wrong exit at a roundabout on the A10 so had to play catch up with them for a few miles, which is surprisingly easy on a FZ6. On a nice straight bit of road where you could see for miles, and there were no other cars (but their bikes in the distance) I opened it up and the speedo tripped over into 3 digits for the first time ever. :-)
I then realised I wasn't in top gear so changed up. Twice!!!! Chuff me, it does a ton in 4th and still has two gears languishing in the comfy chairs smoking pipes and drinking Port.
We made good time all the way down to London until the google map directions suggested we turn down a one way street, so we passed on that and made our own way up to the house on the hill. Cracking views over London from up there and you can easily see Canary Wharf and the Gherkin.
Coffee (and a Danish Pastry for the fat git.... guilty as charged) saw us refreshed and ready for a wander round the halls. The stands were much more spread out than the Excel show earlier this year and there were far more stalls selling tools and bits n bobs (rather than whole bikes which my wallet doesn't stretch to). A break for lunch in the on site pub refreshed us and we went off for round 2 picking up some bits n bobs.
The ride home was more eventful in that there was a traffic jam for what seemed like several miles trying to get onto the North Circular. Paul and I (novices that we are) followed Frank (the elder) in filtering past all the traffic. I used my standard assumption that cars will suddenly turn right across your path randomly here, which they did, so made sure I could "make progress" quickly past each car so I was never in their blind spot. We saved loads of time doing this as the cars were pretty much stationary.
The route out of London saw us all split up due to random traffic lights catching us out and Frank and Paul headed off into the distance. Eventually, just before home, I looked in my wing mirrors, and did a double take as Paul appeared in them. They had stopped at a garage thinking I was mile behind, and apparently I whizzed by pretty much straight away.
All home safely, cups of tea, and possibly a biscuit or two, are the order of the day.
100 miles down. Many more to go this summer hopefully :)
Brum Brum.
Due to rather poor navigational skills on my part, I took the wrong exit at a roundabout on the A10 so had to play catch up with them for a few miles, which is surprisingly easy on a FZ6. On a nice straight bit of road where you could see for miles, and there were no other cars (but their bikes in the distance) I opened it up and the speedo tripped over into 3 digits for the first time ever. :-)
I then realised I wasn't in top gear so changed up. Twice!!!! Chuff me, it does a ton in 4th and still has two gears languishing in the comfy chairs smoking pipes and drinking Port.
We made good time all the way down to London until the google map directions suggested we turn down a one way street, so we passed on that and made our own way up to the house on the hill. Cracking views over London from up there and you can easily see Canary Wharf and the Gherkin.
Coffee (and a Danish Pastry for the fat git.... guilty as charged) saw us refreshed and ready for a wander round the halls. The stands were much more spread out than the Excel show earlier this year and there were far more stalls selling tools and bits n bobs (rather than whole bikes which my wallet doesn't stretch to). A break for lunch in the on site pub refreshed us and we went off for round 2 picking up some bits n bobs.
The ride home was more eventful in that there was a traffic jam for what seemed like several miles trying to get onto the North Circular. Paul and I (novices that we are) followed Frank (the elder) in filtering past all the traffic. I used my standard assumption that cars will suddenly turn right across your path randomly here, which they did, so made sure I could "make progress" quickly past each car so I was never in their blind spot. We saved loads of time doing this as the cars were pretty much stationary.
The route out of London saw us all split up due to random traffic lights catching us out and Frank and Paul headed off into the distance. Eventually, just before home, I looked in my wing mirrors, and did a double take as Paul appeared in them. They had stopped at a garage thinking I was mile behind, and apparently I whizzed by pretty much straight away.
All home safely, cups of tea, and possibly a biscuit or two, are the order of the day.
100 miles down. Many more to go this summer hopefully :)
Brum Brum.
Subscribe to:
Posts (Atom)